OT-Inspired Mother's Day Crafts
0T-Inspired Mother's Day Crafts

Looking for some simple crafts for this Mother's Day? These activities not only create beautiful memories for your family, but are also fun activities that integrate play-based movement that is beneficial for your child's development, including hand eye coordination and fine motor skills.
Canvas Hand & Foot Print
Supplies
- 1 canvas per child
- Paint Brushes
- Paint (any color)
- Sharpie Markers
Instructions
- Paint the child's left hand in any color. Place in the center of canvas and press down. Paint the child's right foot a different color. Place next to hand print and press down. Wait for the paint to dry. If a child is able to write themselves, write as follows over the handprint "...this little hand stole my heart" (if the child is unable to write the message you can write it for them!) Over the footprint have them write/or you write "...and this little foot ran away with it!) Write a Happy Mother's Day Message somewhere on the canvas, and remember to have them sign and date their artwork!

Source: https://www.toolstogrowot.com/blog/2015/05/03/mothers-day-3-d-flower-craft
Supplies
- Scissors
- Glue/Tape
- Crayons/Markers
- Flower Pot Drawing with Stem and Flowers (Available on Google!)
Instructions
- Print drawing on heavy card stock paper, or glue to heavy paper. Each child will need one of the following:
- 1 Flower Pot Page, 1 Flower Border Folding Page, 1 Flowers Page, 1 Stems Page
- Step 1: Assemble Flower Pot: Color the Flower Pot. Write the reason(s) why you love your Mom on the pot. Cut out around the black (thicker) dotted lines, and along the top of the Flower Pot. Note: Make sure the “flaps” stay attached to the Flower Pot! Fold on the red (thinner) dotted lines to allow for your Flower Pot to become 3-D and “pop” out of the page. This is where the flowers will sit. Glue Tabs and glue to Flower Border Page (once folded) as indicated.
- Step 2: Assemble Flower Border Folding Page. This page will stand up! Tip: Follow steps in order to fold & form the base.
- Step 3: Tape/Glue Flower Pot on Flower Border Folding Page as indicated. This is the Flower Pot where your flowers will sit in!
- Step 4: Color Flowers and Stems as indicated on the Color by Number Code. There are two different versions included.
- Step 5: Cut out Flowers and Stems.
- Step 6: Tape/Glue Flowers to the top of each stem.
- Step 7:
Place Flowers into the Flower Pot and enjoy!
Source: https://www.theottoolbox.com/mothers-day-you-are-tea-riffic-card/
Supplies
- Paper
- Tape
- Tea bag
- Sticker/flower/something to stick to the tea bag’s tag
- Markers/crayons
Instructions
- Grab a piece of paper or cardstock for the card. Fold it in half. Next, use your mom’s favorite tea.
- Pull the tea out of the wrapper and stretch out the string. Then, you can decorate the paper tab with a sticker, or by coloring on the paper label. Other ideas include creating a paper flower and gluing it on the the paper. We used foam sticky flowers for a Spring-y touch.
Tea-riffic!

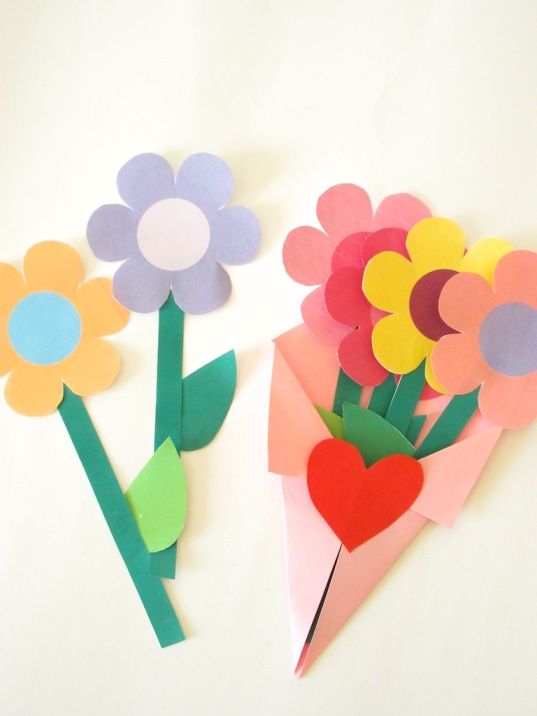
Construction Paper Bouquet
Source: PMC
Supplies
- Construction paper (any 2 colors & green)
- Scissors
- Glue stick
- Sharpie marker
Instructions
- Pick any color construction paper you would like to make the flower holder. Make the piece of paper into a square by folding bottom right corner to the top left edge. Cut excess.
- With crease going down the center, fold the right corner to meet the crease and repeat the process on the left. On a separate piece of construction paper (any color of your choosing) trace 6 hearts. Cut out the hearts
- Cut out 6 strips of green construction paper. Glue 3 strips equally spaced apart to the inside of your bouquet. Glue the other 3 strips of green construction paper to the bottom of the previous stems and half way up. Fold 3 of your heart shapes in half. Glue one side of the folded heart to the matching side of the unfolded heart
- Glue one heart to each stem. Fold the right top corner so the point is past the edge of the paper. Repeat step on the left side. Glue the folds from step 4 together in the middle. Glue down the folds. Fold the top half of stems
- Write a “Happy Mother’s Day” message on the front. Sign the back of your artwork
Additional Ideas
Source: https://creativecota.com/celebrate-mothers-day-with-crafts-and-occupational-therapy-activities/
Crafts and Activities:
- Handprint Bouquet: Create a beautiful bouquet using handprints as flowers. This activity enhances fine motor skills as children cut out and trace their handprints and develops sensory awareness through the tactile experience of painting.
- Decorative Cards: Design personalized Mother’s Day cards with colorful drawings and heartfelt messages. This craft encourages creativity and improves hand-eye coordination as children manipulate art materials like markers, crayons, and stickers.
- Fingerprint Jewelry Dish: Make a unique jewelry dish by pressing fingerprints into air-dry clay. This activity strengthens hand muscles and improves finger dexterity while fostering sensory exploration through clay manipulation.
- Flower Pot Painting: Decorate clay flower pots with vibrant colors and patterns. Painting flower pots enhances grip strength and control, promoting wrist stability and coordination.
- Tissue Paper Flowers: Craft colorful flowers using tissue paper and pipe cleaners. This activity refines hand skills as children crumple, fold, and twist tissue paper, improving bilateral coordination and finger strength.
- Yarn-Wrapped Letters: Wrap yarn around cardboard letters to create personalized initials or “mom” signs. Yarn wrapping enhances hand strength and coordination while encouraging creativity and attention to detail.
- Storybook Sharing: Read books about mothers and families together, discussing themes of love and appreciation. Storytime promotes language development, comprehension skills, and emotional expression.


